
How to Use a Digital Torque Wrench for Precision Fastening
When tackling any project that requires precise fastening, a digital torque wrench is an indispensable tool that ensures accuracy and safety. This guide will walk you through everything you need to know about selecting, using, and maintaining a digital torque wrench to get the most out of your investment. Whether you're working on automotive repairs, assembling machinery, or handling DIY home projects, understanding how to operate this device properly can prevent over-tightening or under-tightening, which could lead to failures or damage. In this step-by-step how-to, we'll focus on practical instructions to make your fastening tasks efficient and reliable.
Understanding the Basics of a Digital Torque Wrench
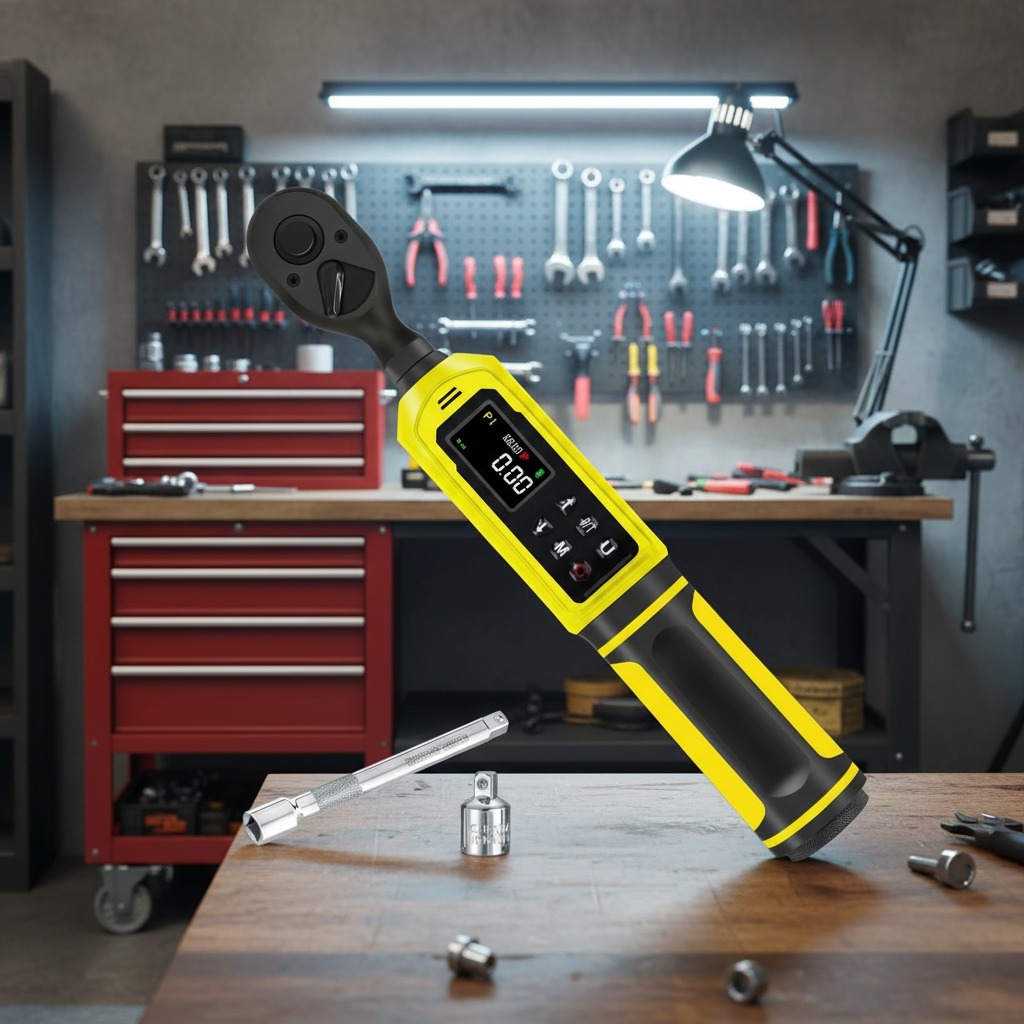
Before diving into usage, it's essential to grasp what sets a digital torque wrench apart from traditional models. A digital torque wrench features an electronic sensor that measures torque in real-time and displays it on an LCD screen, allowing for precise readings down to the decimal point. This tool typically operates on a battery and offers multiple units like foot-pounds (ft-lb) or Newton-meters (Nm), making it versatile for various applications.
Start by familiarizing yourself with the components: the handle for applying force, the drive square for attaching sockets, the digital display showing torque values, and control buttons for setting presets or modes. High-quality models, like those with a vibrant yellow finish for visibility, often include ergonomic designs to reduce hand strain. Always check the specifications to ensure it matches your needs— for instance, a range of 10 to 150 ft-lb is common for automotive use.
To get started, insert fresh batteries if needed and turn the wrench on using the power button. Calibrate it if the model requires, following the manufacturer's instructions, which usually involves zeroing the reading without load. This initial setup ensures your digital torque wrench provides accurate measurements from the outset.
Step-by-Step Guide to Setting Up and Using Your Digital Torque Wrench
Now, let's move to the practical steps for using a digital torque wrench effectively. First, select the appropriate socket size that fits your fastener, such as a bolt or nut. Attach the socket securely to the drive square of the wrench, ensuring it's firmly seated to avoid slippage during operation.
Next, set your desired torque value using the digital interface. Most digital torque wrenches have plus and minus buttons to input the target torque— for example, if you're torquing lug nuts on a car wheel to 80 ft-lb, enter that value precisely. The display will confirm the setting, and some models emit a beep or vibrate when the target is reached, adding an extra layer of convenience.
Position the wrench on the fastener and apply steady, clockwise force to the handle. As you turn, watch the digital display for the rising torque reading. Stop immediately when it hits your preset value to avoid overshooting. For counterclockwise tasks, like loosening, switch the direction indicator if available, and monitor the display similarly. Remember to apply force smoothly and perpendicular to the handle for the most accurate results.
After use, release the preset by resetting the display to zero. This prevents accidental over-torquing on the next fastener. For extension bars, which are often included with premium digital torque wrenches, attach them to reach tight spaces, but note that they may slightly alter the effective length, so adjust your settings accordingly if the tool compensates digitally.
Best Practices for Accuracy and Safety with a Digital Torque Wrench
To maximize the precision of your digital torque wrench, follow these best practices. Always work in a clean environment to prevent debris from interfering with the sensor. Store the tool in its carrying case when not in use, protecting the display from impacts and keeping it away from extreme temperatures that could affect battery life or calibration.
Regular maintenance is key: clean the drive square and handle after each job, and check the battery level before starting. Many digital torque wrenches require annual calibration by a professional to maintain accuracy within ±2-4% tolerance. If your model features data output via Bluetooth, you can log readings for quality control in professional settings.
Safety-wise, wear protective gear like gloves and eye protection, especially in automotive or industrial scenarios. Never use the wrench as a breaker bar for loosening stubborn fasteners, as this can damage the internal electronics. If you're new to this, practice on non-critical fasteners to build confidence in reading the display and feeling the click or beep cues.
For automotive applications, consult your vehicle's service manual for exact torque specs— a digital torque wrench shines here by preventing wheel lug damage that could lead to accidents. In industrial use, it ensures compliance with standards like ISO or ASME, reducing liability risks.
Advanced Tips for Incorporating a Digital Torque Wrench into Your Toolkit
Once you're comfortable with the basics, explore advanced features to elevate your projects. Many digital torque wrenches offer multiple modes, such as peak torque hold, which records the maximum value achieved, or track mode for continuous monitoring. Use peak mode for auditing previous tightenings and track mode for dynamic applications like engine assembly.
Customize settings for different materials: softer metals like aluminum require lower torque to avoid stripping, while steel can handle higher values. If your digital torque wrench includes an angle measurement feature, combine it with torque for critical joints, ensuring both tightness and proper seating.
Integrate it with other tools for efficiency— pair it with a ratchet for initial loosening, then switch to the digital torque wrench for precise re-tightening. For home DIYers, it's perfect for furniture assembly or bike repairs, where over-tightening can crack frames.
Choosing the right model matters; opt for one with a durable, eye-catching design like a bright yellow body for easy spotting in your toolbox. Ergonomic handles and intuitive interfaces reduce fatigue, making long sessions more bearable. Priced affordably yet built for pros, these tools blend technology with practicality.
Maintaining Your Digital Torque Wrench for Longevity
Long-term care ensures your digital torque wrench remains a reliable companion. Store it horizontally in its case to prevent strain on the mechanism. Avoid dropping it, as impacts can misalign the sensor— if it happens, recalibrate immediately.
Battery management is crucial: use rechargeable types if supported, and turn off the device after use to conserve power. Update firmware if your model allows, via USB or app, for enhanced features like improved accuracy algorithms.
In summary, mastering a digital torque wrench involves understanding its digital advantages, following precise steps for setup and application, adhering to safety protocols, and committing to maintenance. By incorporating these guidelines, you'll achieve professional-level results in every project, from garage tweaks to industrial builds. This tool not only boosts efficiency but also instills confidence in your work, making it a must-have for any serious toolkit.


