
For any cycling enthusiast, from the weekend warrior to the daily commuter, the pursuit of a perfect ride is constant. We invest in lighter frames, more aerodynamic components, and comfortable apparel, all in the name of efficiency and enjoyment. Yet, one of the most critical, and often overlooked, factors in cycling performance and safety costs very little: correct tire pressure. The only way to truly know and control this variable is with a reliable bicycle tire pressure gauge. This small, inexpensive device is an indispensable part of any cyclist's toolkit, ensuring every ride is as safe, efficient, and comfortable as possible.
The Critical Role of Correct Tire Pressure
Why is a few PSI (pounds per square inch) here or there so important? The effects of tire pressure are far-reaching. For performance, optimal pressure minimizes rolling resistance by creating the ideal contact patch with the road, allowing you to go faster with less effort. If your tires are under-inflated, they deform excessively, creating drag and making you work much harder. Conversely, over-inflating your tires can make them too rigid, reducing the contact patch and potentially decreasing grip, especially in corners. Safety is another paramount concern. Under-inflated tires are highly susceptible to 'pinch flats,' where the inner tube gets pinched between the rim and an obstacle like a pothole. They can also feel squirmy and unstable during handling. Over-inflation creates a harsh, bumpy ride with less traction and significantly increases the risk of a blowout, which can be catastrophic at speed. Finally, proper inflation directly impacts comfort and tire longevity. The right pressure allows the tire casing to flex and absorb road vibrations, smoothing out your ride. It also ensures the tire wears evenly across its surface, extending its life and saving you money in the long run.
Choosing Your Perfect Pressure Measurement Tool
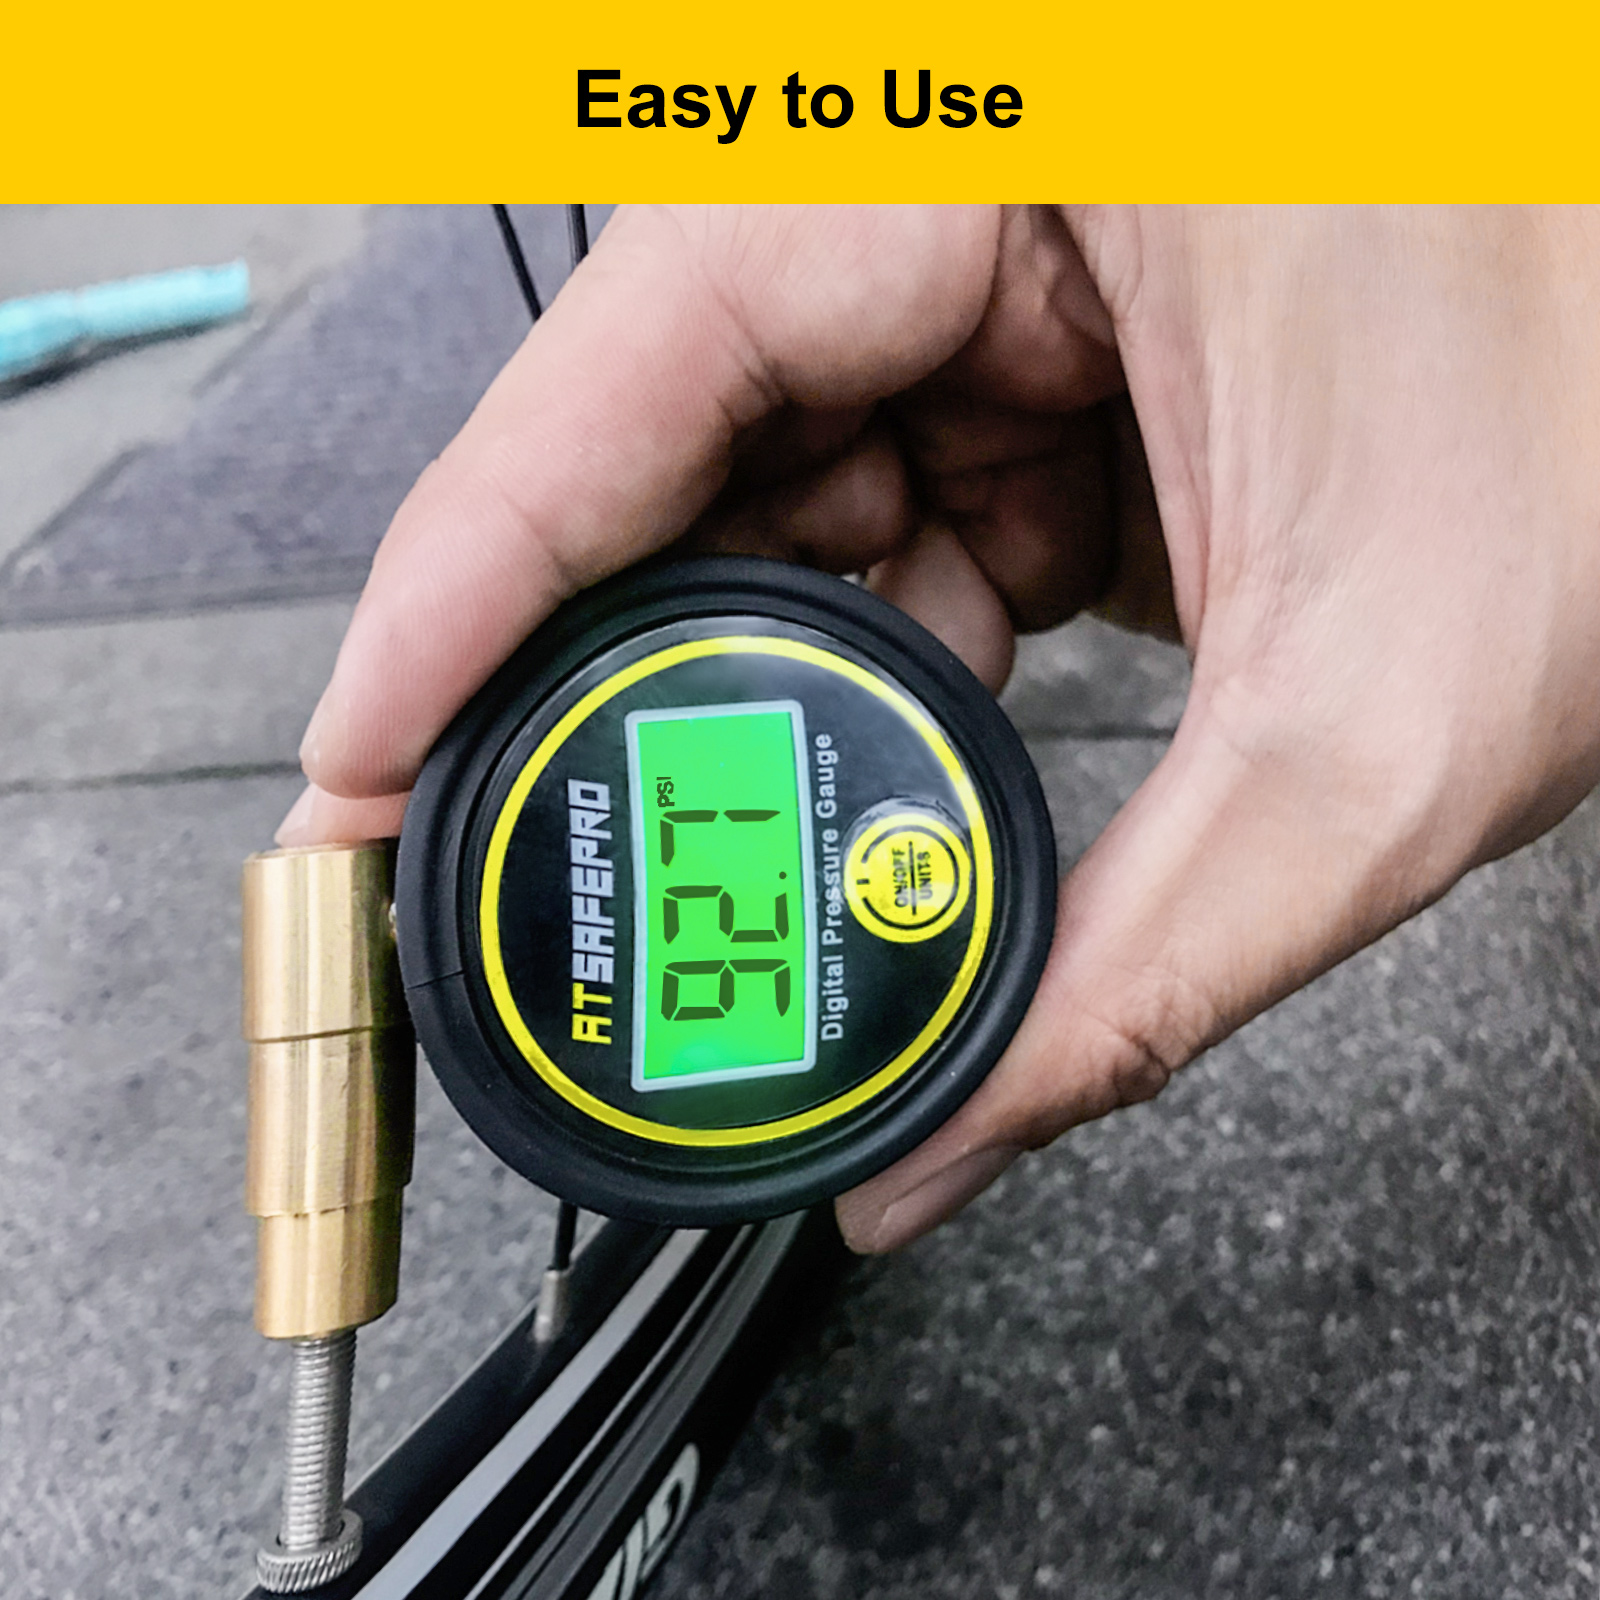
When it comes to selecting a gauge, you have several options, each with its own set of advantages. The modern choice for many is a digital bicycle tire gauge. These devices offer unparalleled accuracy and an easy-to-read backlit screen, often displaying pressure to a tenth of a PSI. Many digital models also allow you to switch between different units of measurement (PSI, BAR, kPa) and may have a 'bleed' button to let out small amounts of air for precise adjustments. Their main drawback is the reliance on batteries. Another popular option is the classic dial or analog gauge. These are known for their durability and reliability, as they have no electronics to fail. A good quality dial gauge can be very accurate, though perhaps not as precise as a digital one, and it provides a clear visual on a clock-like face. For those who prioritize portability, the simple pencil gauge is the most compact and lightweight option, easily fitting into a small saddlebag. While generally less accurate than their digital or dial counterparts, they are great as a backup or for on-the-go checks. Many floor pumps come with a built-in gauge, making them a convenient all-in-one bike tire inflation tool. However, the gauges on pumps, especially less expensive models, can be less accurate than a dedicated, standalone gauge. It's a common best practice to use a separate, trusted gauge to verify the pressure even when using a pump with a built-in one.
Mastering the Art of Checking and Inflating
Using your gauge is a simple but essential skill. First, locate the recommended pressure range, which is printed on the sidewall of your tires. This range is your starting point. Next, remove the valve cap. If you have Presta valves (the thin ones common on road and high-performance bikes), you'll need to unscrew the small locknut at the tip. For Schrader valves (the same type found on cars), you're ready to go. Press the gauge head firmly and squarely onto the valve stem. You'll hear a brief hiss of air as the gauge takes its reading. Compare this reading to the manufacturer's recommendation and your personal preference. To add air, use a quality bike tire inflation tool like a floor pump for home use or a mini-pump for roadside adjustments. Inflate in short bursts, checking the pressure with your dedicated gauge periodically until you reach your target. For the ultimate in advanced technology, some cyclists are even adopting a bike tire pressure monitor system (TPMS), which provides real-time pressure data wirelessly to a head unit, alerting you instantly to any changes. This technology is becoming more accessible and offers peace of mind, especially on long-distance rides or races.
Fine-Tuning Your Pressure for the Perfect Ride
While the pressure range on your tire's sidewall is a great guide, the optimal pressure is personal and depends on several factors. Rider weight is the most significant; a heavier rider requires more pressure than a lighter rider on the same tires to achieve similar ride characteristics. Tire width also plays a huge role. Wider tires have a larger air volume and can be run at much lower pressures than narrow road tires, providing a more comfortable and grippy ride without increasing rolling resistance. Your riding surface is another key consideration. For smooth, pristine pavement, you can run pressure at the higher end of the spectrum for maximum efficiency. For rough roads, gravel, or wet conditions, dropping the pressure by 5-15 PSI will increase comfort, expand the tire's contact patch, and significantly improve traction and control. The type of setup you have matters as well. Tubeless tires, which don't use an inner tube, can safely be run at lower pressures because the risk of a pinch flat is eliminated. This is a major advantage for mountain, gravel, and even many road cyclists seeking the ultimate combination of grip and comfort. Experimenting by making small adjustments of a few PSI before different types of rides will help you discover the perfect pressure for you and your bike. This attention to detail is what separates a good ride from a great one, and it all starts with an accurate bicycle tire pressure gauge.


